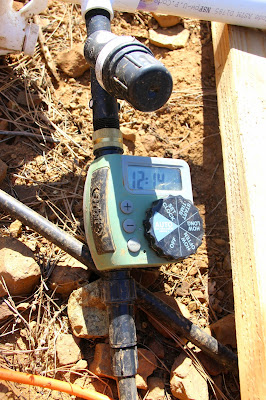
Gone are the days of killing plants because you forgot to water them. Below is a fun and easy weekend how to DIY project: a home irrigation system.
Materials:
-water source-hose/sprinkler timer
-1/2 in. poly tubing
-connector to connect tubing to timer
-cleanable drip heads 4 gallon/hr (number of drip heads depend on the number of plants and amount of water needed)
Step 1:
Connect the timer to the water source and the tubing to the timer.Step 2:
Lay out the 1/2 in. tubing where you would like to water.Step 3:
Use a puncher which punches a clean hole in the poly tubing so you can insert the drip head. With a little force push the drip head into the tubing.Step 4:
Set the timer for the amount of water the particular plants you are watering need. I started seeds in this lineup. At first I gave them an hours worth of water a day per plant. I realized that was way to much water for the seeds. I then reduced it to 2 minutes four times a day.This method works flawlessly if it doesn't you fucked it up. Feel free to comment below if what you are using your irrigation system to grow.


This comment has been removed by the author.
ReplyDeletevery nice article !!!!
ReplyDeletedrip irrigation saves almost 90% of water in the farming and I enjoyed this thing and learn from it. there are different types of irrigation which also help to conserve water.